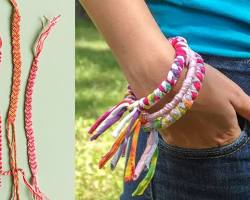
Ever wondered how to start and finish a friendship bracelet? These colorful woven tokens of friendship have captured hearts for generations. Creating your friendship bracelet is a fun and rewarding way to express your creativity and share a piece of your handiwork with a special friend. This guide will take you through the essential steps, from gathering materials to finishing the ends, so you can start weaving your friendship magic!
Gathering Your Supplies
To embark on your friendship bracelet adventure, you'll need a few simple materials:
Embroidery Floss: Pick at least two contrasting colors of embroidery floss. The vibrant colors are a big part of the friendship bracelet's charm!

Scissors: Scissors will come in handy for cutting your floss to the desired length.
Masking Tape (Optional): A small piece of masking tape can help secure the starting knot while you work on the bracelet.
Safety Pin (Optional): A safety pin can be used to attach the bracelet to a pillow or piece of fabric while you work, keeping your hands free.
Ruler (Optional): A ruler can help measure the length of your floss before you start braiding.
Choosing Your Pattern (Optional)
The beauty of friendship bracelets lies in their endless variety of patterns. Once you've mastered the basic techniques, you can explore a vast world of designs! Websites like Pinterest or craft books offer a treasure trove of friendship bracelet patterns for every skill level.
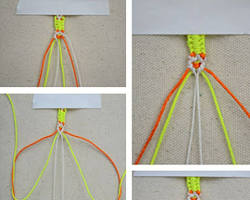
Getting Started: The Basic Knot
The foundation of most friendship bracelet patterns is the forward knot. Mastering this simple knot is the key to weaving your way to friendship bracelet success:
Hold the Floss: Hold two different colored strands of floss together in one hand, leaving equal lengths of "tail" at the bottom (around 6 inches is a good starting point).
From the Loop: With one color strand, make a loop over your thumb.
Under and Through: Take the bottom color strand (the one that isn't looped over your thumb) under the loop and then up through the middle of the loop.
Pull Tight: Gently but firmly pull both sides of the floss to tighten the knot. A secure knot should form at the base of the loop.
Repeat: Repeat steps 2-4 with the opposite color strand going over the loop to create another forward knot. Congratulations, you've just woven your first two steps of friendship bracelet magic!
Building the Bracelet: Rows and Consistency
Friendship bracelets are built by continuing rows of forward knots. Here are some tips for achieving a neat and even bracelet:
Maintain Tension: As you tie the knots, try to maintain consistent tension on both strands of floss. This will help create a bracelet that lays flat and has a uniform look.
Building Rows: Continue alternating colors, tying a forward knot with each color, to build up rows of the chosen pattern.
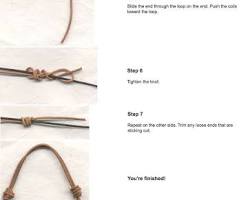
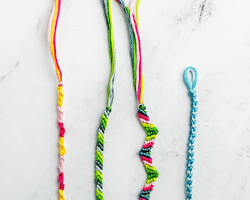
Finishing Touches: Securing the Ends
Once you've reached the desired length for your bracelet, it's time to secure the ends. Here are two popular methods:
Square Knot Method: Tie a series of square knots using the remaining floss to form a secure ending. You can find tutorials online or in craft books for tying a square knot.
Overhand Knot and Braid Method: Tie an overhand knot at the end of the bracelet. Then, braid the remaining floss for a short distance and secure it with another overhand knot. Cut off any excess floss.
Adding the Finishing Touches (Optional)
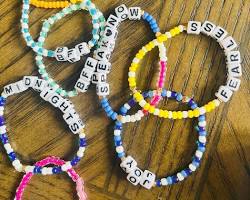
For an extra touch of personalization, you can consider adding a clasp to your bracelet or incorporating decorative beads into the design (optional step).
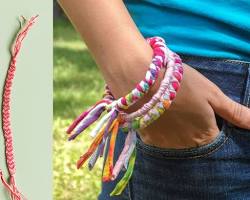
With a little practice and these basic steps, you'll be weaving beautiful friendship bracelets in no time! Don't be afraid to experiment with different colors and patterns to create unique and meaningful tokens of friendship. So grab your floss, get creative, and start weaving your way to friendship bracelet fun! We'd love to see your creations – feel free to share pictures of your friendship bracelets online!

Stiven is an experienced bracelet making expert with over 10 years of making experience. They have a deep knowledge of a variety of materials and techniques to create a variety of exquisite bracelets, from simple beaded bracelets to complex multi-strand braided bracelets.
This article was written by Stiven in combination with AI. The content described in this article is based on the author's personal opinions and data collection. If there are any errors or deficiencies, please correct me.