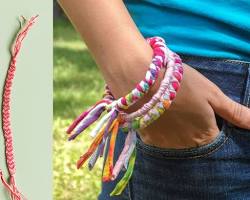
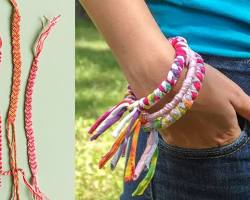
Ever wanted to create your own friendship bracelets but felt intimidated by the patterns? Fear not! These colorful woven wonders are surprisingly easy to make once you understand how to follow a friendship bracelet pattern. This guide will take you from deciphering the symbols to completing your very own bracelet, ready to share with your besties.
Understanding the Pattern Layout
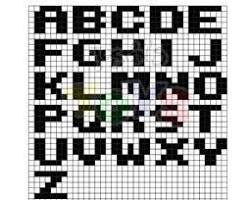
Friendship bracelet patterns use a simple visual language. Look for vertical lines with colored letters representing the string colors you'll be using. Numbers on either side of the pattern indicate the rows of knots you'll make. Some patterns are diagonal, meaning you'll knot diagonally across the rows. Others, like alphabetic patterns, use horizontal rows. The type of pattern will determine the direction you knot in each row.

Mastering the Knots: Forward and Backward
The magic of friendship bracelets lies in just two fundamental knots: the forward knot and the backward knot. Let's break them down:
Forward Knot: This is the basic building block. Hold the bracelet with the string you want to move on the right. Pass it over the other string, then under and up through the loop created by the stationary string. Pull both strings gently to tighten the knot.

Backward Knot: This is a mirror image of the forward knot. Hold the string you want to move on the left. Pass it over the other string, then under and up through the loop. Pull tight.

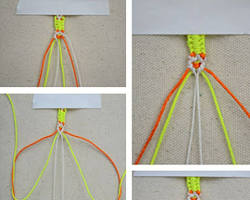
Reading the Pattern: Row by Row
Now for the fun part: creating your bracelet! Follow the pattern one row at a time, focusing on the color changes and knot types indicated. You might see a symbol like a blank space, which means you skip that string color for that row. Keep any unused strings above your work to avoid confusion as you move down the pattern.
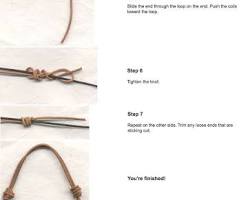
Finishing Touches: Tying and Securing the Ends
Once you've completed the pattern, it's time to secure your masterpiece. Tie the ends together using a square knot. Here's how:
Make a simple knot with the two strings.
Take the right string and form a loop around the left string.
Pass the right string under the left string, then up through the loop you just created.
Pull the right string to tighten.
Repeat steps 2-4 with the left string, forming another loop around the right string and pulling tight.
Trim any excess string close to the knot. Carefully melt the ends of the string with a lighter (always with adult supervision!) to prevent fraying.
Tips and Tricks for Success
Here are a few bonus tips to make your friendship bracelet journey even smoother:
Use a clipboard or binder clip to hold your pattern in place while you knot.
Start with a longer length of string than you think you'll need. You can always trim later, but it's harder to add string if you run out!
Maintain a consistent tension as you knot for a neat and even finish.
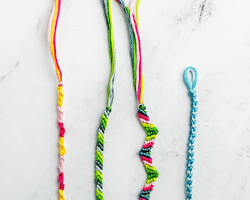
With a little practice and this guide at your side, you'll be a friendship bracelet pro in no time! So grab some colorful string, pick a fun pattern, and get knotting. The possibilities for creativity are endless! Who knows, you might even inspire a new wave of friendship bracelet-making among your friends.

Stiven is an experienced bracelet making expert with over 10 years of making experience. They have a deep knowledge of a variety of materials and techniques to create a variety of exquisite bracelets, from simple beaded bracelets to complex multi-strand braided bracelets.
This article was written by Stiven in combination with AI. The content described in this article is based on the author's personal opinions and data collection. If there are any errors or deficiencies, please correct me.