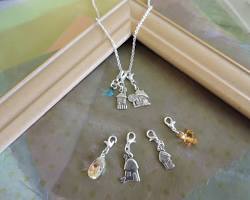
Ever wondered how to put together an Italian charm bracelet? These beautiful, personalized pieces are more than just accessories – they tell your story. This guide will unveil the secrets to building a unique italian charm bracelet that reflects your personality and style. With a little planning and creativity, you'll be well on your way to crafting a cherished piece that holds special meaning.
Understanding the Canvas: Types of Italian charm bracelets
Italian charm bracelets come in two main styles to suit your preference:
Starter Bracelets: These basic bracelets typically feature a clasp and a loop or chain specifically designed for attaching charms.

Safety Chains: These bracelets offer additional security with a clasp and a chain with multiple loops for attaching charms. Safety chains help prevent charms from falling off if the clasp accidentally opens.

Choosing Your Charms: Telling Your Story
The beauty of an Italian charm bracelet lies in its ability to be personalized. The key is to select charms that hold special meaning to you, representing your interests, hobbies, or life milestones. Here are some categories to inspire your charm selection:
Memories: Birthstones for loved ones, initials for special people in your life, or charms depicting travel destinations you've visited
Hobbies and Interests: Sports charms for your favorite team, musical instruments for your passion, or animal charms representing your furry friends.
Milestones: Graduation caps for academic achievements, career-related charms for your professional journey, or baby footprints to celebrate new beginnings.
Symbols: Hearts for love, stars for aspirations, or religious symbols that reflect your faith.
Building Your Bracelet: Composition and Balance
Once you have your charms, it's time to create a visually appealing arrangement. Here are some tips for achieving composition and balance on your bracelet:
Spaced Out: Leaving a bit of space between charms allows them to stand out individually and move freely on the bracelet.
Symmetrical vs. Asymmetrical: Choose an arrangement that complements your style. For a classic look, consider placing heavier charms towards the center and lighter charms on the ends. For a more whimsical touch, an asymmetrical arrangement can be visually interesting.
Weight Distribution: Distributing heavier charms evenly throughout the bracelet helps prevent it from hanging lopsided on your wrist.
Securing Your Charms: The Art of Attachment
Now it's time to securely attach your chosen charms to your bracelet. Here are the common methods you might encounter:
Lobster Clasps: These charms have a small clasp that requires a jump ring (a small, circular metal ring) to attach to the loop on your bracelet.

Screw-On Charms: These charms have a threaded end that screws directly onto the threads of the bracelet.

Clips: Some charms have built-in clips that allow them to attach directly to the links of the bracelet.

Adding the Finishing Touch: Clasp Selection
The clasp is the finishing touch on your Italian charm bracelet. Choose a clasp that complements the overall design and your style. Here are two popular options:
Lobster Clasp: This is the most common type of clasp, offering a secure and easy-to-use closure.
Barrel Clasp: This clasp features two barrel-shaped ends that screw together to secure the bracelet.
With a selection of meaningful charms, a touch of creativity, and the tips in this guide, you're well on your way to building a unique and personalized Italian charm bracelet. So unleash your creativity, have fun selecting charms that tell your story, and get ready to show off your masterpiece! We'd love to see your finished creations – feel free to share pictures of your Italian charm bracelets online!
This article was written by Stiven in combination with AI. The content described in this article is based on the author's personal opinions and data collection. If there are any errors or deficiencies, please correct me.