Ever stared at a pile of colorful embroidery floss, wondering how long to make friendship bracelet strings? Friendship bracelets are cherished tokens of friendship and a fun way to express your creative side. But before you get braiding, using the right string length is crucial for a successful project. This guide will unravel the mystery of string length, helping you determine the perfect measurement for your next masterpiece.
Beyond the Basics: Factors Affecting String Length
There's more to string length than just the finished bracelet size! Here are some key factors to consider :
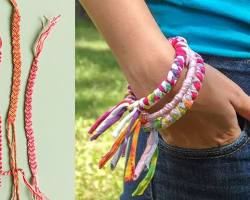
Desired Finished Bracelet Length: This is the foundation. As a rule of thumb, use a string length 2-3 times your desired finished bracelet length. For example, a 7-inch bracelet would need strings 14-21 inches long.
Knot Complexity: Not all knots are created equal. Simpler knots like the forward-backward knot require less string compared to more intricate designs like the Solomon bar knot. If you're unsure about knot complexity, research it beforehand to ensure you have enough string.
Finished Bracelet Width: Wider bracelets need more string to accommodate additional braiding passes. Consider adding an extra inch or two to your string length if you're aiming for a thicker bracelet.
Number of Colors: Planning a multicolored masterpiece? Factor in the number of strands per color. If you're using six strands of three different colors, you'll need a total of 18 strands (6 strands/color x 3 colors). Adjust your overall string length accordingly.
Calculating Your Perfect String Length: A Step-by-Step Guide
Now that you understand the key factors, let's calculate your ideal string length! Here's a simple step-by-step approach:
Decide on your desired finished bracelet length.
Choose your knot type. (Research its complexity if unsure.)
Factor in the desired finished bracelet width. (Wider bracelets might need an extra inch or two.)
Multiply your desired finished bracelet length by 2 or 3 (depending on knot complexity).
Add any additional length needed based on factors like desired width or multiple colors.
Putting It All Together: Examples and User Considerations
For instance, let's say you want a 6-inch bracelet with a simple forward-backward knot and a standard width. Following the steps above:
Desired finished length: 6 inches
Knot type: Simple (forward-backward)
Width: Standard
Following step 4, we get 6 inches x 2 (for knot complexity) = 12 inches. This is a good starting point. Since we want a standard width and aren't using multiple colors, we likely don't need to add extra length. So, 12 inches of string per color would be a good choice for this project.
Don't Clip Too Short!
It's always better to have a little extra string than not enough. You can always trim the excess after braiding is complete. The leftover string is a crafter's gold! Save it for future friendship bracelet creations or other fun projects.
Conclusion
Using the correct string length is essential for creating beautiful and frustration-free friendship bracelets. With a little planning and this guide as your reference, you'll be braiding perfect-length friendship bracelets in no time! So grab your favorite embroidery floss, unleash your creativity, and get started on your next masterpiece!
This article was written by Stiven in combination with AI. The content described in this article is based on the author's personal opinions and data collection. If there are any errors or deficiencies, please correct me.
