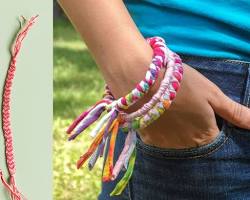
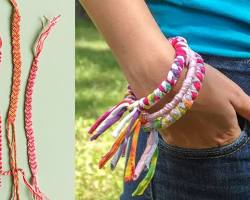
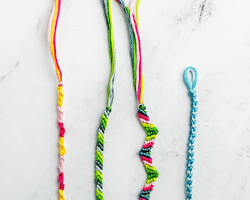
Understanding the Sliding Knot
The beauty of the sliding knot lies in its functionality. Unlike a fixed knot, the sliding knot allows the wearer to adjust the size of the bracelet by simply sliding the loop up or down the floss. This is particularly helpful for bracelets intended as gifts, where you might not know the exact wrist size of the recipient.
Materials Needed (Optional)
The materials you'll need for tying a sliding knot are minimal (refer to our previous article on starting a friendship bracelet for a full material list):
Scissors (optional, only if you need to adjust the floss length)
Preparing the Bracelet
The sliding knot is typically tied at the very beginning of the bracelet before you start weaving your chosen pattern. Before you begin, make sure you have enough floss length to accommodate both the knot itself and the desired size of your finished bracelet.
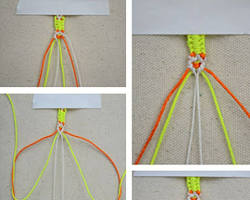
Tying the Sliding Knot: Step-by-Step
Now, let's get knotting! Follow these steps with the help of the visuals to create a secure sliding knot:
Hold the Floss: Hold your two floss strands together, leaving a tail of the desired length at the bottom. This tail should be long enough to comfortably tie the knot and create the body of your bracelet.

Create a Loop: With one of the floss strands, make a loop over your thumb.

Wrap and Thread: Take the other floss strand and wrap it completely around the looped strand. Then, thread it back down through the loop towards the bottom where the two loose ends are hanging.
Pull Tight (First Pass): Gently pull both sides of the floss to tighten the initial loop and wrap around the looped strand.
Repeat the Wrap: Repeat step 3, wrapping the same floss strand around the looped strand again and threading it back down through the loop.
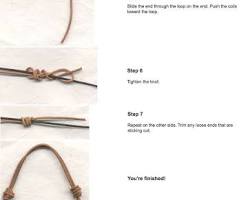
Pull Tight (Second Pass): Once you've wrapped the floss a second time, gently but firmly pull both sides of the floss to tighten the entire knot.
Adjust and Slide: Hold the loop at the top (where the knot is forming) and the two loose ends at the bottom. Now comes the magic! Gently slide the loop up or down the floss to adjust the size of the opening, creating a perfectly fitting bracelet.

Securing the Sliding Knot (Optional)
For some extra peace of mind, you can add a small knot (like an overhand knot) at the base of the loop after tightening the sliding knot (optional step).
Beginning Your Bracelet
Once your sliding knot is secure and adjusted to your desired size, you're all set to begin weaving your chosen friendship bracelet pattern!
With a little practice and these easy-to-follow steps, you'll be a master of the sliding knot in no time. This handy technique ensures your friendship bracelets are no longer a one-size-fits-all situation. So grab your floss, get creative with your patterns, and start creating adjustable friendship bracelets that anyone can wear with comfort and style! We'd love to see your creations with sliding knots – feel free to share pictures of your friendship bracelets online!

Stiven is an experienced bracelet making expert with over 10 years of making experience. They have a deep knowledge of a variety of materials and techniques to create a variety of exquisite bracelets, from simple beaded bracelets to complex multi-strand braided bracelets.
This article was written by Stiven in combination with AI. The content described in this article is based on the author's personal opinions and data collection. If there are any errors or deficiencies, please correct me.