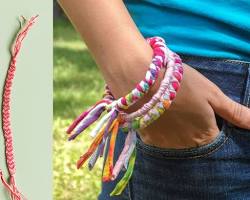
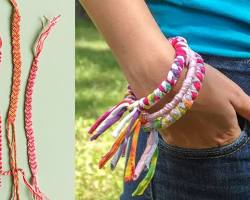
friendship bracelets – those colorful threads of creativity and connection – have captured hearts for generations. But before you embark on weaving your own masterpiece, mastering the basic knots is key. This guide will equip you with clear instructions and visuals to conquer the essential friendship bracelet knots, empowering you to create these timeless tokens of friendship.
Essential Supplies
To begin your friendship bracelet adventure, you'll need a few simple tools:
Embroidery floss in a variety of colors (pick colors that hold special meaning for you and your friend!)
Scissors
Masking tape (optional, for securing the ends of the floss)
Ruler (optional, to measure bracelet length)
Understanding the Knots
The beauty of friendship bracelet patterns lies in their simplicity. Most designs are built upon two fundamental knots: the forward knot and the backward knot. Once you master these two techniques, the possibilities for creativity are endless!
Tying the Forward Knot
Let's get started with the forward knot!
Holding the Floss: Separate your embroidery floss strands into two equal groups. Hold one group taut – this will be your working thread. The other group will be your base thread.
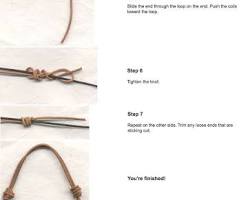
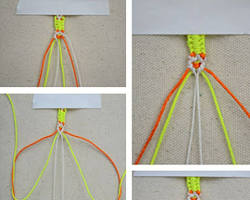
Creating the Forward Knot (Step-by-Step with Visuals):
Hold the working thread up and over the base thread.
Loop the working thread under the base thread and back up through the loop you just created.
Gently pull on both threads to tighten the knot. You've created a secure loop around the base thread.

(You can include an image here or link to a relevant image source)
Tying the Backward Knot
The backward knot is like the forward knot's twin, but with a twist (literally!):
The Twist: Instead of looping the working thread up and over the base thread like in the forward knot, here you'll go under and then up.
Creating the Backward Knot (Step-by-Step with Visuals):
Hold the working thread under and up around the base thread.
Loop the working thread down through the loop you just created around the base thread.
Gently pull on both threads to tighten the knot. There you have it – the backward knot!

(You can include an image here or link to a relevant image source)
Building Your Design
Now that you've mastered these essential knots, you're ready to create! Friendship bracelet patterns typically alternate colors and knotting techniques (forward and backward) to build the design. Many free resources online offer a vast collection of patterns for all skill levels.
Keeping Your Tension Even
As you knot, strive to maintain consistent tension on the floss. This will result in a neat and polished-looking bracelet. Don't worry, with a little practice, achieving even tension becomes second nature.
Additional Knots (Optional):
The world of friendship bracelets extends beyond the forward and backward knot. As you gain confidence, explore other techniques like the diagonal stitch or chevron patterns, adding complexity and unique design elements to your creations. Many online tutorials can guide you through these more advanced knots.
Conclusion
Learning how to tie friendship bracelet knots opens the door to a world of creative expression and meaningful connections. With a little practice, you'll be weaving colorful threads of friendship into beautiful bracelets that celebrate the special bonds you share with your loved ones. So grab your floss, get knotting, and let your creativity flow!

Stiven is an experienced bracelet making expert with over 10 years of making experience. They have a deep knowledge of a variety of materials and techniques to create a variety of exquisite bracelets, from simple beaded bracelets to complex multi-strand braided bracelets.
This article was written by Stiven in combination with AI. The content described in this article is based on the author's personal opinions and data collection. If there are any errors or deficiencies, please correct me.