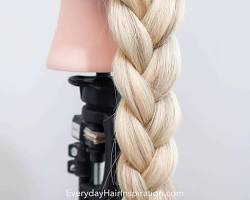
How to make a fishtail bracelet with thread? These trendy woven wonders are surprisingly easy to create, requiring just a few simple materials and a fun braiding technique. This guide will walk you through the process step-by-step, transforming colorful thread into a stylish bracelet you can wear with pride.
Materials and Tools: Gathering Your Supplies
To get started, you'll need a few basic items:
Embroidery floss: This comes in a vast array of colors, so you can choose a single shade for a classic look or create a rainbow of colors for a more vibrant design.]

Scissors: Opt for sharp scissors to ensure clean cuts for your thread.
Tape (optional): This can be helpful for securing the thread while you braid, especially if you're a beginner.
Mastering the Basic Braid (Optional)
While not essential, understanding a basic braid can be a helpful foundation for creating a fishtail braid. A basic braid involves three strands of thread woven together. Here's a quick refresher (optional):
Hold three strands of thread together, one in each hand and one in the middle.
Take the rightmost strand and pass it over the middle strand, placing it next to the leftmost strand.
Repeat steps 2 and 3, always moving the outer strand to the center.
Continue braiding until the desired length is reached.

Braiding the Fishtail: Step-by-Step Guide
Now, let's get to the fun part – creating the fishtail braid!
Start with four strands of embroidery floss cut to your desired length. Remember, the finished bracelet will be shorter than the thread you start with, so plan accordingly.
Secure the ends of the thread together with a simple knot. Alternatively, you can use a piece of tape to secure the threads to a flat surface for easier braiding.
Divide the threads into two equal sections, with two strands on the left and two strands on the right.
Here comes the fishtail magic! Take the outermost strand from the left side and bring it over all the other threads, placing it on the right side. This strand becomes the new outermost strand on the right.
Now, take the outermost strand from the right side and bring it over all the other threads, placing it on the left side. This strand becomes the new outermost strand on the left.
Repeat steps 4 and 5, consistently moving the outermost strand from each side to the opposite side. This creates the distinctive weaving pattern of a fishtail braid.
Continue braiding until your bracelet reaches the desired length.
Finishing Touches: Securing and Customizing
With your braid complete, it's time to secure the end. You can simply tie a knot in the ends of the threads, or for a more polished look, consider using a crimp bead and jump ring. Here's a quick tip: crimp beads are small metal tubes that crimp shut around the thread, holding a jump ring in place. The jump ring can then be attached to a clasp for easy on-and-off wear.
Feeling creative? The beauty of fishtail bracelets lies in their customization. Here are some ideas to get you started:
Use a variety of thread colors to create a patterned or striped design.
While braiding, incorporate small beads into the design for added texture and personalization.
Explore different braiding techniques beyond the basic fishtail. For example, try a diagonal fishtail braid for a unique twist.
With a little practice and this guide, you'll be a fishtail braiding pro in no time! So grab some thread, unleash your creativity, and get ready to craft a beautiful and personalized fishtail bracelet. The possibilities are endless! Don't forget to share your creation online – we'd love to see your braiding skills in action!
This article was written by Stiven in combination with AI. The content described in this article is based on the author's personal opinions and data collection. If there are any errors or deficiencies, please correct me.