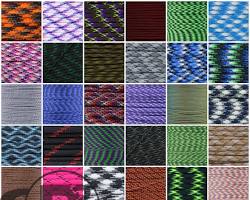
Ever wondered how to make a two-color paracord bracelet? Paracord bracelets are a popular and practical accessory, and the classic single-color design is a great place to start. However, with a little extra know-how, you can elevate your bracelet game and create stylish two-color designs! This guide will provide step-by-step instructions for crafting a beautiful two-color paracord bracelet, perfect for showcasing your unique style.
Materials and Tools: Crafting Essentials
To embark on your two-color paracord bracelet adventure, you'll need a few essentials:
Paracord:Choose two colors that complement each other for your design preference .

Lighter (optional): A lighter can be used to carefully melt the paracord ends to prevent fraying (be sure to use caution and have a heat-resistant surface nearby).
Buckle or Clasp (optional): This adds a finished look to your bracelet.
Understanding the Basic Knot: The Cobra Weave
The foundation of your two-color masterpiece lies in the cobra weave knot. This simple yet effective knot creates a distinctive braid pattern when woven together. To get a clear understanding of how to tie a cobra weave knot with two separate strings, here's a helpful image or short video tutorial . Once you've grasped the basic cobra weave, you're ready to weave some two-color magic!

Weaving the Two-Tone Magic: Step-by-Step Guide
Now that you're familiar with the cobra weave, let's get started on creating your bracelet:
Prepare Your Paracord: Cut two equal lengths of paracord in your chosen colors.
Optional: Prevent Fraying: If desired, use a lighter to carefully melt the ends of the paracord to prevent fraying. Remember to exercise caution and use a heat-resistant surface.
Buckle Up (Optional): If you're using a buckle or clasp, thread both paracord ends through the designated holes.
Secure the Start: Tie a secure knot at the bottom of the paracord ends to create a starting point for braiding.
Weaving in Two Tones: Following the cobra weave knot technique you practiced earlier, begin weaving the bracelet. Choose one color as your primary color – this will be the color visible on the front of the bracelet.
Alternating Colors: With each knot, alternate which paracord color is your primary color. The other color will naturally wrap around the core of the braid as you weave.
Reaching Your Desired Length: Continue weaving the bracelet to your desired length, maintaining the two-color pattern throughout the braid.
Finishing Touches: Securing and Customization
With your bracelet woven, it's time to secure the end. Simply weave the remaining paracord ends into the braid itself, ensuring they are snug and secure. Trim any excess paracord with your scissors.
Now comes the fun part – customization! Here are a few ways to personalize your two-color paracord bracelet:
A Rainbow of Colors: Feeling adventurous? Don't limit yourself to two colors! Experiment with using more than two paracord colors to create a more complex design.
Beaded Beauty: Add a touch of elegance by incorporating small beads into your braid. These can be threaded onto one of the paracord colors before you begin weaving.
Clasp with Class: While a simple knot can secure your bracelet, consider using a clasp or buckle for a more polished look. There are various clasp and buckle styles available, so you can find one that complements your design.
With a little practice and this guide at your fingertips, you'll be a two-color paracord bracelet pro in no time. So grab your materials, unleash your creativity, and get ready to craft stylish and unique two-color paracord bracelets! We'd love to see your creations – don't hesitate to share pictures of your finished bracelets online.
This article was written by Stiven in combination with AI. The content described in this article is based on the author's personal opinions and data collection. If there are any errors or deficiencies, please correct me.