paracord bracelets are a popular and practical accessory, but adding a buckle takes them to the next level! How to make a paracord bracelet with a buckle? It's easier than you might think! This guide will walk you through the process step-by-step, creating a stylish and functional bracelet you can wear with pride.
Materials on Deck: Gathering Your Supplies
To create your paracord bracelet with a buckle, you'll need a few key items:
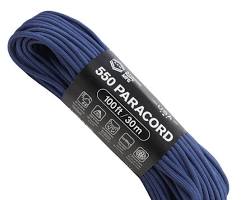
Paracord: The length will depend on your desired bracelet size. 550 paracord is a common choice, known for its durability.

Buckle: Pick a plastic or metal buckle with two separate parts. Choose a color and style that complements your paracord!
Scissors
Lighter (optional, for melting cord ends)
Sizing It Up: Determining Your Bracelet Length
Before you start weaving, it's important to determine the right size for your bracelet. Grab a measuring tape and measure your wrist comfortably. A good rule of thumb is to add 2-3 inches to your wrist measurement. This extra length accounts for the knot size and buckle closure, ensuring your bracelet fits comfortably.
Buckle Up! Attaching the Paracord
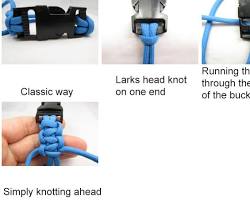
Now, let's get weaving! First, you'll need to attach the paracord to the buckle. Thread one end of the paracord through one side of the buckle, then pull it through until snug. Repeat this step with the other end of the paracord and the other side of the buckle. Now you have both ends of your paracord securely attached to the buckle, ready for braiding.

Knot Time: The Cobra Weave Explained
The Cobra weave is a popular and beginner-friendly knot for paracord bracelets. It involves alternating between weaving the core (center) paracord strands under and over the working (outer) paracord strand. Many excellent online tutorials demonstrate the Cobra weave in detail, with visual aids to guide you through each step.
VI. Weaving It Together: Creating Your Bracelet
With your buckle attached and the Cobra weave in mind, you're ready to start creating your bracelet! Take the two loose ends of the paracord attached to the buckle and begin weaving using the Cobra weave technique. Maintain tension on the paracord as you weave to create a tight and secure braid.
VII. Trimming and Securing: Finishing Touches
Once you've reached your desired bracelet length, it's time to secure the ends. Use scissors to trim the excess paracord close to the braid. If you have a lighter, you can carefully melt the trimmed ends to prevent fraying. Gently push the melted ends into the braid to hide them for a clean finish.
VIII. Buckle Up and Wear It Proud!
Now for the rewarding part - wearing your creation! Simply loop the bracelet around your wrist and use the buckle to secure it comfortably. Congratulations, you've made your own stylish paracord bracelet with a buckle!
IX. Beyond the Basics: Exploring Variations
The beauty of paracord bracelets with buckles lies in their customization. Want to add a pop of color? Use two different colored paracords for a two-toned or patterned look. Feeling fancy? Incorporate beads or other embellishments into your braid for a personalized touch.
X. Conclusion
Creating your paracord bracelet with a buckle is a fun and rewarding experience. It's a great way to craft a stylish and functional accessory while learning a new skill. So grab your paracord, pick out a cool buckle, and get braiding! The possibilities for design and customization are endless.
XI. Call to Action
We'd love to see your paracord bracelet creations with buckles! Share pictures of your finished product online using the hashtag #BuckleUpBracelets.
This article was written by Stiven in combination with AI. The content described in this article is based on the author's personal opinions and data collection. If there are any errors or deficiencies, please correct me.