paracord bracelets are more than just cool-looking accessories; they're also a fun and practical craft project. With just a few simple materials and a little know-how, you can create your stylish paracord bracelet. This guide will walk you through two popular weaving styles: the classic cobra weave and the simple braid weave.
Materials Needed
Before you unleash your inner crafter, gather these supplies:

Paracord (length will depend on desired bracelet size)
Scissors
Lighter (optional, for finishing touches)
Buckles or clasps (optional)
Fid (optional, weaving tool)
Creating a Cobra Weave Paracord Bracelet
Preparing the Paracord: Start by measuring your paracord. The ideal length will depend on the size of your wrist and whether you'll be using a buckle or clasp. A general rule of thumb is to cut a piece 3-4 times the desired bracelet length. Once you have your paracord cut to size, you can optionally use a lighter to melt the ends to prevent fraying. Briefly hold the flame to the frayed end and then pinch the melted plastic to create a smooth tip.
Creating the Core: Take your paracord and fold it in half, creating a loop at the folded end. If you're using a buckle or clasp, attach the looped end to it by threading it through the designated hole and securing it with a knot.
Mastering the Cobra Weave: Here comes the fun part - the actual weaving! The cobra weave involves maneuvering the two separate strands of paracord around a central core strand. There are many resources online with visual guides to help you understand the technique. The key is to maintain consistent tension on the paracord as you weave, ensuring a neat and secure braid.
Finishing the Bracelet: Once your bracelet reaches the desired length, weave the remaining paracord ends back into the body of the bracelet for a secure finish. You can again use the lighter (optional) to melt the ends slightly before pushing them back into the weave and trimming any excess.
Crafting a Braided Paracord Bracelet
Preparing the Paracord: The preparation for a braided bracelet is the same as the cobra weave (refer to Section I.1).
Creating the Braid: For the braid weave, you'll need three separate strands of paracord. Hold all three strands together at one end and begin a simple braid. There's no fancy footwork here - just a classic three-strand braid like you might do with your hair. The key is to maintain an even and consistent braid throughout the length of the bracelet.
Finishing the Bracelet: Similar to the cobra weave, once your bracelet reaches the desired length, weave the ends back into the braid for a secure finish. You can again use the lighter (optional) to melt and fuse the ends for added security.
Additional Tips and Tricks for Success
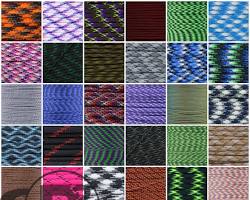
Don't be afraid to experiment! Paracord comes in a vast array of colors, so you can create solid-colored bracelets, patterned designs, or even incorporate beads for a personalized touch.
If you're a beginner, consider using a fid (weaving tool). This small tool can help you separate the strands and maneuver them more easily, especially when learning the cobra weave.
When starting, it's better to err on the side of caution and cut a longer piece of paracord. You can always trim the excess later, but it's difficult to add length once you've woven the bracelet.
With a little practice, you'll be a paracord bracelet-making pro in no time! So grab your supplies, choose your favorite colors, and get ready to craft some cool and functional accessories. The possibilities are endless!

Stiven is an experienced bracelet making expert with over 10 years of making experience. They have a deep knowledge of a variety of materials and techniques to create a variety of exquisite bracelets, from simple beaded bracelets to complex multi-strand braided bracelets.
This article was written by Stiven in combination with AI. The content described in this article is based on the author's personal opinions and data collection. If there are any errors or deficiencies, please correct me.