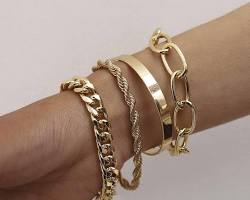
Ever love a bracelet but find it a little too snug, or perhaps a bit too loose? How to make your bracelet adjustable is a question with a simple answer – there are several clever techniques you can use to ensure a perfect fit! This guide will explore 3 different methods for making your bracelet adjustable, so you can wear your favorite creations with confidence.
Understanding Your Options: Adjustable Techniques
There are various ways to make your bracelet adjustable, depending on the style of bracelet you're creating and your desired level of adjustability. Here are 3 popular methods to consider:
Sliding Knot:A simple and versatile knot that creates a loop for easy size adjustment .

Barrel Clasp:A pre-made clasp with a sliding mechanism for smooth size changes .
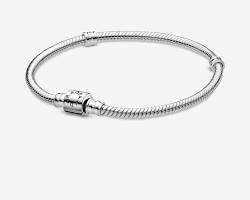
Chain Extender:A short chain with loops on each end, allowing for additional length to the bracelet .

The Simple Slide: Using a Sliding Knot (Beginner)
The sliding knot is a fantastic option for beginners and works well with string or cord bracelets. Here's how to create one:
Gather Your Supplies: You'll need scissors, string or cord for your bracelet, and an optional bead to decorate the knot.
Secure the Start: Begin by tying a secure knot at one end of your string or cord to create a base for the bracelet.
Loop for Adjustment: When making your starting knot, leave extra space to create a loop in the string or cord. This loop will be used to adjust the size of the bracelet later.
Weave and Slide: Start weaving your bracelet design, incorporating the string or cord that goes through the loop you created in step 3. As you weave, this string or cord will act as the adjustable element.
Finishing Touches: Once your bracelet reaches your desired length, tie a secure knot at the end, leaving room to slide the loop for size adjustment. For an extra touch, thread a bead onto the string or cord that goes through the loop.
The Easy Exchange: Using a Barrel Clasp (Beginner)
For a pre-made solution, a barrel clasp offers a quick and easy way to make your bracelet adjustable. Here's what you need to know:
The Clasp Explained: A barrel clasp consists of two metal tubes that slide into each other, creating a secure closure. The size of the clasp should complement your bracelet design.
Attaching the Clasp: Select a barrel clasp and use jump rings or crimp clasps (depending on your clasp type) to attach the two halves of the clasp to opposite ends of your finished bracelet.
Adding Length with Style: Using a Chain Extender (Intermediate)
A chain extender adds a touch of elegance while providing adjustability. Here's how to incorporate one into your bracelet:
Choosing Your Extender: Select a chain extender length that complements the overall style of your bracelet.
Attaching for Adjustment: Using a jump ring or crimp clasp, attach one loop of the chain extender to the clasp on your finished bracelet. This allows for size adjustment.
Clasp or Charm: On the other loop of the chain extender, you can attach your preferred clasp (for further size adjustment) or a charm to personalize your bracelet.
With these techniques at your disposal, you can transform any bracelet into an adjustable masterpiece! Consider the style of your bracelet and your desired level of adjustability when choosing a method. A study by the American Society of Hand Therapists found that wearing properly fitting bracelets can help prevent wrist discomfort, so don't hesitate to adjust your bracelets for optimal comfort and style. We'd love to see your creations – feel free to share pictures of your bracelets with adjustable closures online!
This article was written by Stiven in combination with AI. The content described in this article is based on the author's personal opinions and data collection. If there are any errors or deficiencies, please correct me.

