paracord bracelets have become a popular and versatile accessory among outdoor enthusiasts, survivalists, and fashion-conscious individuals alike. These stylish yet functional bracelets are crafted from parachute cord, a lightweight nylon kern mantle rope known for its incredible strength and durability. Not only do paracord bracelets add a touch of rugged style to any outfit, but they also serve as a potentially life-saving survival tool in emergencies.
One of the best things about paracord bracelets is that they are incredibly easy and inexpensive to make yourself. With just a few simple materials and some basic knotting techniques, you can create a custom bracelet that reflects your style and preferences. In this comprehensive guide, we'll walk you through the step-by-step process of making your very own paracord bracelet, from choosing the right materials to mastering popular patterns and designs.

Before you begin, gather the following materials:
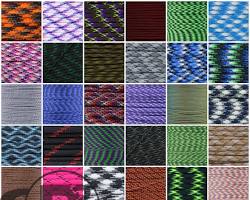
- Paracord: Choose a high-quality paracord in your desired color or pattern. For a standard-sized bracelet, you'll need approximately 7-10 feet of paracord.
- Buckle: A side-release buckle or shackle is commonly used to secure the bracelet. Choose a size that complements the thickness of your paracord.
- Scissors: A sharp pair of scissors or paracord shears for cutting the cord.
- Lighter (optional): A lighter can be used to melt and fuse the paracord ends for a clean finish.
You can find these materials at most craft stores, outdoor retailers, or online marketplaces specializing in paracord supplies.
Before you start knotting, it's important to prepare your paracord for the project:
1. Measure your wrist to determine the desired bracelet length. A good rule of thumb is to add 2-3 inches to your wrist measurement to ensure a comfortable fit.
2. Cut the paracord to the appropriate length, leaving a few extra inches for the knots and finishing touches.
3. If using a buckle, attach it to one end of the paracord by threading the cord through the buckle and securing it with a knot.
Paracord bracelets are created by tying a series of knots along the length of the cord. Here are two essential knots to master:
Cobra Knot
1. Form a loop with the paracord, leaving a tail.
2. Pass the working end of the cord through the loop.
3. Pass the working end behind the tail and through the loop again.
4. Pull both ends tightly to secure the knot.
Square Knot
1. Make a loop with the paracord, leaving a tail.
2. Pass the working end through the loop.
3. Make another loop with the working end and pass the tail through this new loop.
4. Pull both ends tightly to secure the knot.
These basic knots will serve as the foundation for more complex bracelet patterns.
Cobra Weave/Solomon Bar
The cobra weave, also known as the Solomon bar, is a classic and popular paracord bracelet pattern. Here's how to create it:
1. Start with a cobra knot at one end of the paracord.
2. Tie a series of forward-facing cobra knots, working your way down the length of the cord.
3. Once you've reached the desired length, secure the final knot and trim any excess cord.
Fishtail Braid
For a more intricate and visually striking design, try the fishtail braid pattern:
1. Start with a square knot at one end of the paracord.
2. Separate the paracord into two equal strands.
3. Take the outer strand from one side and weave it over, under, and over the opposite strand.
4. Repeat this pattern, alternating sides and keeping the tension even.
5. Once you've reached the desired length, secure the final knot and trim any excess cord.
Once you've completed your desired pattern, it's time to finish off your paracord bracelet:
1. Secure the final knot by passing the working end through the last few knots and pulling tight.
2. If desired, use a lighter to carefully melt the paracord ends, fusing them for a clean finish.
3. Add embellishments like beads or charms by threading them onto the paracord before tying the final knots.
To ensure your paracord bracelet fits comfortably, you may need to adjust the length:
- If the bracelet is too loose, simply retie the knots closer together to shorten the overall length.
- If the bracelet is too tight, carefully untie a few knots and re-tie them with more space between each knot to lengthen the bracelet.
Paracord bracelets are designed to be durable and long-lasting, but proper care will help them maintain their appearance and integrity:
- Avoid exposing your bracelet to excessive moisture or chemicals, as these can weaken the paracord over time.
- Gently wipe the bracelet with a damp cloth to remove dirt or debris.
- Store your bracelet in a cool, dry place when not in use.
Remember, in an emergency, you can always unravel your paracord bracelet to access the strong, versatile cord within for various survival uses.
While paracord bracelets are stylish accessories, their true value lies in their potential survival applications. The paracord used to make these bracelets is incredibly strong and can be used for a variety of purposes in emergencies, such as:
- Building shelters or creating makeshift tents
- Securing gear or creating improvised backpacks
- Fashioning fishing lines, snares, or tripwires
- Lashing together materials for splints or stretchers
- Serving as a makeshift rope for climbing or rappelling
Once you've mastered the art of making paracord bracelets, you can explore other paracord projects like lanyards, keychains, or even larger-scale items like hammocks or cargo nets.
Making your paracord bracelet is a fun, rewarding, and practical craft that combines style and functionality. With the right materials and techniques, you can create a custom accessory that not only looks great but also serves as a potentially life-saving survival tool.
Don't be afraid to experiment with different patterns, colors, and designs to make your paracord bracelet truly unique. And remember, the more you practice, the easier it will become to master the art of knotting and weaving paracord.
Whether you're an outdoor enthusiast, a survivalist, or simply someone who appreciates handmade accessories, a paracord bracelet is a versatile and meaningful addition to your collection. So grab your materials, follow the steps outlined in this guide, and let your creativity shine through in your very own paracord masterpiece.

Stiven is an experienced bracelet making expert with over 10 years of making experience. They have a deep knowledge of a variety of materials and techniques to create a variety of exquisite bracelets, from simple beaded bracelets to complex multi-strand braided bracelets.
This article was written by Stiven in combination with AI. The content described in this article is based on the author's personal opinions and data collection. If there are any errors or deficiencies, please correct me.