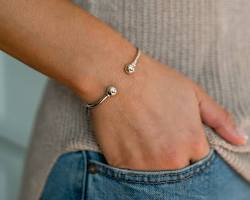
Slip knot bracelets are all the rage – and for good reason! These trendy accessories offer a touch of effortless style with the added benefit of being adjustable for a perfect fit. The best part? Crafting your own slip knot bracelet is surprisingly simple, requiring just minimal materials and a single knot you can master in minutes. So, how to make a slip knot bracelet and join the fun? This guide will walk you through the process step-by-step!
Materials Needed:
Gather these essentials to bring your slip knot bracelet vision to life:

String (embroidery floss, twine, etc.) in your desired color(s) and length (around 36 inches is a good starting point for a standard bracelet)
Scissors (to cut the string)
Optional: Beads (for embellishment)
Understanding the Slip Knot
The magic behind a slip knot bracelet lies in the knot itself. A slip knot is a unique knot that creates a loop that can be adjusted by pulling on the loose ends. This very loop becomes the closure for your bracelet, making it both stylish and functional.
Step-by-Step Guide: Creating the Slip Knot Bracelet
Now that you're prepped with the materials and the basic concept, let's get braiding (well, knotting!) your very own slip knot bracelet:
Preparing the String: Measure and cut a length of string in your desired color. Remember, you can always adjust the length later with the slip knot, but 36 inches is a good starting point for most wrist sizes.
Forming the Loop: Take the cut string and fold it in half. This will create a loop at one end, which will become the base of your bracelet.
Tying the Slip Knot: Here comes the fun part – the slip knot itself! Hold the loop in your non-dominant hand with the two loose ends of the string pointing towards you. Now, with your dominant hand, make a hole near the base of the loop using your thumb and index finger. Take one of the loose ends and thread it down through this hole you created, then bring it back up through the loop itself. Grab the other loose end and gently pull both ends to tighten the knot. You should now have a secure loop with two loose ends coming out of the bottom. This is your slip knot!
Adding Beads (Optional): If you want to add a touch of personalization with beads, now's the time! Simply thread your desired beads onto one of the loose ends before proceeding to the next step.
Securing the Ends and Adjusting: Here's where the magic of the slip knot comes into play. Take the other loose end (or the end with beads if you used them) and slide it through the loop you created in step 3. This will tighten the knot around your wrist, creating the bracelet closure. The beauty lies in the adjustability – to make the bracelet tighter, simply pull on the two loose ends that are now dangling from the knot. To loosen it, gently pull on the loop itself.
Additional Tips:
The thickness of your string can affect the look and feel of your bracelet. Use a thicker string for a bolder statement piece or a thinner string for a more delicate look.
It's always a good idea to measure your wrist before cutting the string. You can adjust the length as you create the bracelet using the slip knot, but having a starting point based on your wrist size helps avoid wasting string.
Slip knot bracelets are a testament to how simple and stylish handmade accessories can be. With just a single knot and a bit of creativity, you can craft a bracelet that reflects your unique style. So, grab your string, experiment with different colors and embellishments, and get ready to slip on a piece of handcrafted beauty!
Bonus Tip:
For an extra layer of security, after tightening the slip knot around your wrist, you can apply a small dab of clear nail polish to the knot itself. Let the nail polish dry completely before wearing the bracelet.
This article was written by Stiven in combination with AI. The content described in this article is based on the author's personal opinions and data collection. If there are any errors or deficiencies, please correct me.


