How to make a name bracelet with string and beads? Name bracelets are a fun and easy way to add a touch of personalization to any outfit. They're perfect for kids and adults alike, and with a few simple materials, you can create a unique bracelet that spells out your name or a special message. This guide will walk you through the process step-by-step, from gathering supplies to tying the finishing knot.
Materials and Tools: Gathering Your Supplies
To get started on your name bracelet adventure, you'll need a few essentials:
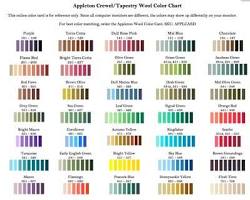
Embroidery floss: This versatile thread comes in a vast array of colors, allowing you to create a simple or colorful design. Choose colors that complement the alphabet beads you select.

Alphabet beads: These plastic or acrylic beads come in a variety of letter styles and colors. Opt for lightweight beads to ensure your bracelet remains comfortable to wear.
Pony beads (optional): These small, colorful beads can be used as spacers between your letter beads, adding visual interest and preventing the letter beads from crowding together.
Scissors: A sharp pair of scissors will ensure clean cuts for your thread.
Measuring tape: Having an accurate measurement of your wrist is crucial for creating a bracelet that fits comfortably.
Clasp (optional, but recommended): A clasp will make your bracelet easier to put on and take off.
Crimp beads and jump rings (if using a clasp): These small metal components will create a secure closure for your bracelet.
Sizing It Up: Finding the Perfect Fit
Before diving into the stringing fun, it's important to measure your wrist to determine the ideal bracelet length. Grab your measuring tape and wrap it comfortably around your wrist. A good rule of thumb is to add an inch (2.54 cm) to your wrist measurement to account for the clasp (if using one) and ensure the bracelet isn't too tight.
Choosing Your Design: Simple or Stylish
The beauty of name bracelets lies in their customization. You can create a simple and classic design using just alphabet beads to spell out your name, or you can get more creative with a variety of colors and techniques. Here are some ideas to inspire you:
Simple and Sweet: Thread letter beads in your favorite color to spell out your name. For a touch of elegance, use metallic embroidery floss.
Pop of Color: Alternate between letter beads and pony beads in bright and cheerful colors.
Pattern Power: Create a striped or patterned design using different colored embroidery floss throughout the bracelet.
Stringing Along: Building Your Bracelet
Now that you have your design in mind, let's get to the fun part – stringing your bracelet!
Cut a length of embroidery floss based on your wrist measurement, plus an extra few inches for tying knots and attaching a clasp (if using one).
Thread the string through a crimp bead (if using a clasp), then fold the string in half to create a loop.
Make a knot at the end of the loop to secure it. This will be the starting loop for your bracelet.
Thread on a letter bead or pony bead (depending on your design).
Continue threading letter beads and pony beads (if using) to spell out your name.
Once you've finished spelling out your name, add more beads for design or to reach your desired length.
Thread the end of the string through another crimp bead (if using a clasp).
Finishing Touches: Securing and Customization
With your bracelet strung, it's time to secure it. Here's how to use a clasp (if you opted for one):
Use a jump ring to connect the loop at the beginning of the bracelet to the crimp bead at the end. This creates a secure closure.
Here are alternative ways to secure your bracelet without a clasp (optional):
Tie the two ends of the string together in a square knot for a simple closure. You can find instructions for tying a square knot online.

Braid the ends of the string together for a more decorative finish.
There you have it! With a little planning and this guide, you've created a personalized name bracelet that reflects your style. Don't be afraid to experiment with different colors, patterns, and bead combinations. The possibilities are endless! So grab your string and beads, and get ready to spell out something special. We'd love to see your creations – feel free to share pictures of your finished name bracelets online!
This article was written by Stiven in combination with AI. The content described in this article is based on the author's personal opinions and data collection. If there are any errors or deficiencies, please correct me.