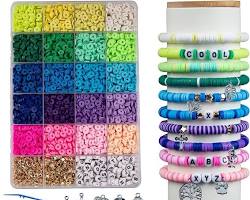
Ever struggle to find a bracelet that fits just right? How to make adjustable bracelets with string? The answer lies in simple yet creative designs that adapt to any wrist size. This guide will introduce you to two popular adjustable string bracelet styles, allowing you to craft comfortable and personalized jewelry with just a few materials.
Materials and Tools: Crafting Essentials
The beauty of string bracelets lies in their simplicity. To get started, gather a few essentials:
String:Choose a strong cord like embroidery floss, hemp, or waxed cotton . Let your creativity shine with a variety of colors!

Scissors
Beads (optional):Add a touch of personalization with beads in various shapes, sizes, and colors .

Clasps (optional): For a more finished look, you can incorporate clasps specifically designed for string bracelets.
Lighter (optional): If you find the string ends fraying, a lighter can be used to melt them for a clean finish.
Design Decisions: Choosing Your Style
With your materials at hand, it's time to pick your perfect design! We'll explore two popular options for adjustable string bracelets:
The Sliding Knot Marvel: Simple and secure, this design is perfect for beginners and offers a quick and easy way to create an adjustable bracelet.
Braided Beauty with a Twist: This design incorporates a basic braid with a loop and bead closure, adding a touch of intricacy and personalization.
The Sliding Knot Marvel: Step-by-Step Guide
The sliding knot bracelet is a great choice for those looking for a quick and adjustable accessory. Here's how to create one:
Cut a long piece of string, approximately three times your desired bracelet length.
Fold the string in half, creating a loop at the fold.
Make an overhand knot at the top of the loop, leaving some space for your beads (if using).
Slide your beads (if using) onto the two loose ends of the string.
Thread both loose ends of the string through the loop created in step 2.
Gently pull on both string ends to tighten the knot. The loop should slide up and down the string, allowing you to adjust the bracelet size to fit your wrist comfortably.
For added security, tie a knot at the end of each string. If you prefer a clean finish, you can carefully melt the ends with a lighter (be sure to use caution and have a heat-resistant surface nearby).
Braided Beauty with a Twist: Step-by-Step Guide
Feeling a bit more adventurous? Try creating a braided bracelet with a loop and bead closure:
Cut three equal lengths of string in your chosen colors.
Secure the top ends of the strings together with a knot or a piece of tape.
Begin a basic braid, weaving the three strings together until the braid reaches your desired length. You can find instructions for braiding online if needed.
Leave a few inches of extra string at the end of the braid.
On one of the braided strings, tie a loop at the end, leaving an opening large enough to comfortably slide a bead through.
Slide a bead (optional) onto the remaining two strings.
Tie a knot at the end of the two remaining strings to secure the bead.
To wear the bracelet, simply loop the loose end of the braided string through the bead, creating an adjustable closure.
Design Variations and Customization
The world of string bracelets is your oyster! Here are some ways to personalize your creation:
Color Chaos: Experiment with different colored strings to create patterns or stripes. You can even use a single color for a classic look.
Bling It On: Incorporate more beads or even small charms to reflect your unique style.
Mix and Match: Feeling bold? Combine the sliding knot technique with a braided section for a unique design.
With a little string and some creativity, you can now craft beautiful and adjustable bracelets that fit perfectly. So grab your materials, unleash your inner designer, and get ready to create personalized jewelry that reflects your style! We'd love to see your creations – don't hesitate to share pictures of your finished string bracelets online.
This article was written by Stiven in combination with AI. The content described in this article is based on the author's personal opinions and data collection. If there are any errors or deficiencies, please correct me.