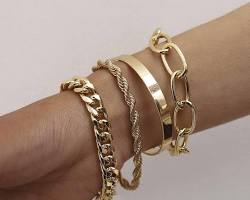
string bracelets are a delightful and accessible way to adorn your wrist with a touch of creativity. With just some string and a few basic knots, you can craft unique and eye-catching jewelry that reflects your style. The beauty of string bracelets lies in their versatility – there are designs suitable for all ages and skill levels! So, how to make a bracelet with string and embark on your stringy adventure? This guide will equip you with everything you need to know!
Materials Needed:
Gather these essentials to bring your string bracelet vision to life:

String (embroidery floss, twine, etc.) in your desired colors and lengths
Scissors (to cut the string)
Optional: Beads, charms, masking tape (for complex patterns)
Choosing Your Design
The world of string bracelets is brimming with possibilities! From simple knotted designs to intricate friendship bracelet patterns, there's a project waiting for everyone. For beginners, we recommend starting with techniques that utilize basic knots. The internet is a treasure trove of free string bracelet patterns, so don't hesitate to explore and find a design that sparks your creativity!
Basic String Bracelet Techniques
Let's delve into two popular string bracelet techniques that are perfect for beginners:
A. Overhand Knot Bracelet: This easy and fun project is ideal for younger crafters or anyone who wants a quick and colorful bracelet.
Preparing the String: Measure and cut several strands of string in your desired length. A good starting point for a standard bracelet is around 24 inches per strand.
Securing the Starting Point: Tie all the string ends together in a simple overhand knot. This creates a secure base for your bracelet.
Continuous Overhand Knots: Hold the strings taut and start knotting! Make consecutive overhand knots down the entire length of the string, pulling them tight to create a braided pattern.
Finishing the Ends: Once you've reached your desired length, tie a final overhand knot at the end. Trim any excess string close to the knot. For an added touch (and to prevent fraying), you can carefully melt the ends with a lighter (be very cautious while doing this!).
B. Friendship Bracelet: This technique offers a bit more challenge but yields a more intricate and personalized bracelet.
Preparing the String: Measure and cut several strands of string in your desired colors and lengths. For a standard bracelet, you'll typically need around 36 inches per strand.
Securing the Starting Point: Tie all the strings together in a simple overhand knot. For stability, while braiding, secure this knotted end to a flat surface like a table using masking tape.
Dividing the Strings: Separate the strings into two equal groups based on the colors you'll be using for your design.
Basic Square Knot: This is the fundamental technique for friendship bracelets. Take the outer strand from one group and pass it over the middle strand of that same group, becoming the new middle strand for that group. Then, do the same with the outer strand from the other group. Repeat this weaving process (outer strand over the middle, switching between groups) to continue braiding the bracelet. Maintain a gentle but consistent tension on the strings for a neat and even weave.
Reaching Desired Length: Continue braiding until your bracelet reaches your desired length, plus an extra inch or so for tying the knot.
Finishing the Ends: Tie a square knot at each end of the braid to secure the bracelet. Trim any excess string and (optional) carefully melt the ends with a lighter to prevent fraying.
Adding Embellishments (Optional)
Feeling creative? String bracelets are a blank canvas for you to add your personal touch! Here are some ideas:
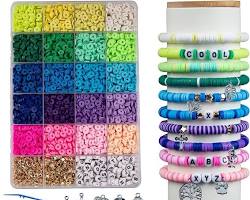
Beads: Thread beads onto the string before braiding for a colorful and textured design.
Charms: Incorporate small charms during specific braiding steps for a unique touch (be sure the charm's opening is large enough to accommodate the string).
Making a bracelet with string is a fun and rewarding activity that allows you to express yourself creatively. With a few basic techniques and a little imagination, the possibilities are endless! So, grab your string, choose your design, and get ready to craft a beautiful and personalized bracelet that you'll love to wear.
Bonus Tip:
For an extra layer of security, after tying your knot(s), you can apply a small dab of clear nail polish to the knot itself. This will help prevent the knot from coming undone over time (be sure to let the nail polish dry completely before wearing the bracelet).
Additional Tips and Tricks:
Use a ruler or measuring tape to ensure all your string lengths are equal for a balanced and symmetrical bracelet.
Experiment with different string colors and textures to create unique and eye-catching designs.
If you make a mistake while braiding, don't fret! You can usually carefully undo the knot and try again.
Practice makes perfect! The more you create, the more comfortable and confident you'll become with different string bracelet techniques.
So, there you have it – a comprehensive guide on how to make a bracelet with string. With these tips and techniques, you're well on your way to crafting beautiful, personalized bracelets that you'll love to wear and share. Happy stringing!
This article was written by Stiven in combination with AI. The content described in this article is based on the author's personal opinions and data collection. If there are any errors or deficiencies, please correct me.

