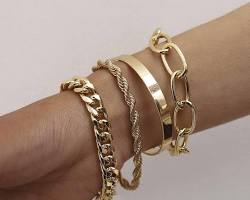
elastic bracelets are a fantastic way to add a pop of color and personality to your outfit. The best part? Creating them yourself is surprisingly simple! With just a few materials and a basic knotting technique, you can be well on your way to crafting beautiful and personalized elastic bracelets. So, how to tie an elastic bracelet and bring your design to life? This guide will show you everything you need to know!
Materials Needed:
Gather these essential supplies to turn your bracelet vision into reality:

Elastic cord (choose a length appropriate for your desired bracelet size – remember, it stretches!)
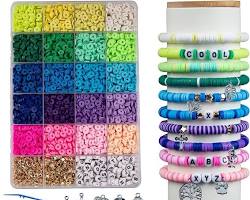
Beads (assorted colors, shapes, and sizes to create your unique design)
Scissors (to snip the cord)
Optional: Jewelry clasp (if you prefer a more secure closure)
Understanding Elastic Cord
Elastic cord, as the name suggests, is a stretchy material that allows the bracelet to comfortably fit around your wrist. However, its stretchiness also means you'll need a secure knot to prevent your bracelet from unraveling and your precious beads from scattering. Elastic cord comes in different thicknesses, and the thickness you choose will affect the number of beads you can comfortably string on it.
Choosing the Right Knot
Not just any knot will do for elastic cord! You'll need a strong and secure knot specifically designed to hold the tension of the elastic and keep your bracelet intact. There are a couple of popular knot options for tying elastic bracelets: the square knot and the surgeon's knot. We'll focus on the square knot in this guide, but we'll mention the surgeon's knot as an alternative.
Step-by-Step Guide: Tying a Square Knot
Let's get to the fun part – stringing your beads and tying the knot!
Stringing the Beads: Get creative and thread your chosen beads onto the elastic cord. There are no right or wrong answers here – design your bracelet to reflect your style!
Leaving Tail Ends: Once you've finished stringing your beads, leave enough cord at each end for tying the knot. A good rule of thumb is to leave around 1-2 inches of tail on each side.
Creating the First Loop: Take one of the tail ends and fold it back towards the strung beads, creating a loop at the end of the cord.
Second Cord Through the Loop: Now, take the other tail end of the cord and carefully thread it up through the loop you just created in step 3.
Pulling Tight: Hold both ends of the cord securely and gently pull on them to tighten the first half of the knot. Make sure the loop stays closed as you tighten.
Repeating the Loop and Pull: Here's where the knot gets secure! Repeat steps 3-5. Create another loop with the same tail end you used in step 3, and then thread the other tail end through that new loop. Once again, gently pull on both cords to tighten the second half of the knot.
Trimming the Excess Cord: With your secure knot in place, you can trim any excess cord close to the knot using your scissors.
Alternative Knot: Surgeon's Knot (Optional)
The surgeon's knot is another popular option for tying elastic bracelets. It's known for its strength and security. If you'd like to learn how to tie a surgeon's knot, you can find helpful visual guides and instructions online.
Finishing Touches (Optional): Adding a Clasp
While the square knot is a secure closure, some people prefer the added security of a clasp. If you'd like to incorporate a clasp into your bracelet design, you can do so using appropriate jewelry-making pliers to attach the clasp ends to the remaining cord tails after tying the knot.
Testing and Adjusting
Before you flaunt your new creation, it's important to test the closure. Gently tug on the bracelet to ensure the knot is secure and the clasp (if used) functions properly. If the knot feels loose, you can try tightening it or re-tying it if necessary.
Creating your own elastic bracelets allows you to express your creativity and end up with unique and personalized pieces of jewelry. Now that you know how to tie an elastic bracelet, you can experiment with different bead combinations and knot styles to create a collection you'll love. So grab your beads, unleash your imagination, and get ready to string, knot, and wear your handmade masterpieces!
Bonus Tip:
For easier beading and organization, consider using a clipboard or a dedicated beading board. These tools can help you keep your beads from
This article was written by Stiven in combination with AI. The content described in this article is based on the author's personal opinions and data collection. If there are any errors or deficiencies, please correct me.

