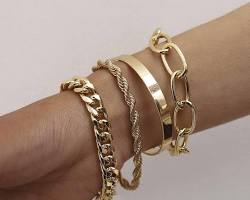
In the world of bracelet making, knot-tying is an essential skill that not only secures your beads and components but also adds visual interest and texture to your designs. Whether you're a beginner or an experienced crafter, mastering a few key knot techniques can elevate your bracelets from ordinary to extraordinary. In this article, we'll guide you through the process of tying knots for bracelets, addressing your needs for easy-to-learn techniques, durable results, and a polished, professional look.
Before we dive into the knot-tying techniques, let's discuss the basic tools you'll need. A pair of sharp scissors, pliers (for crimping or wire-wrapping), and a bead mat will make your knot-tying process smoother and more efficient. Additionally, using conditioned cords or strings designed for jewelry making will ensure your knots hold their shape and remain secure.
Overhand Knot
The overhand knot is a simple yet versatile knot that every bracelet maker should know. It's perfect for securing the end of a bracelet or adding spacers between beads. To tie an overhand knot, create a loop with the cord or string, and pass the end through the loop, pulling tight.
Surgeon's Knot
The surgeon's knot, also known as the double overhand knot, is a secure, non-slip knot that's ideal for adjustable bracelet closures or attaching clasps. To tie a surgeon's knot, create a loop with the cord, pass the end through the loop twice, and then pull both ends tight.
Lark's Head Knot
The lark's head knot is a versatile knot that can be used to attach charms, pendants, or decorative elements to your bracelet. To tie a lark's head knot, create a loop with the cord, pass it around a bead or ring, and then pass the end through the loop, pulling tight.
Square Knot
The square knot is a decorative knot that adds a macramé-style look to your bracelets. It's created by tying two overhand knots in opposite directions, creating a square shape. This knot can be used as a design element or to create patterns and textures along the bracelet.
Sliding Knot
The sliding knot is a must-know technique for creating adjustable bracelet closures. To tie a sliding knot, create a loop with the cord, pass the end through the loop, and then pass it through the loop again, creating a knot that can slide along the cord for adjustability.
Strategic knot placement can transform a simple bracelet into a work of art. Consider using knots to create patterns, textures, or focal points within your design. You can also combine different knot types in a single bracelet for added visual interest and depth.
Once you've tied your knots, it's important to secure the ends and prevent unraveling. You can use a dab of glue or clear nail polish to stiffen the knot and trim any excess cord or string for a neat, polished look.
Knot-tying can be frustrating at times, but with practice and patience, you'll become a pro. If you encounter loose knots, try tightening them gently with pliers or using a knot-tying aid like beeswax or a knot-tying tool for better grip. If a knot becomes stuck or tangled, don't force it – carefully untie it and start over.
Remember, mastering knot-tying takes time and practice, but the rewards are well worth the effort. With these techniques in your arsenal, you'll be able to create stunning, durable bracelets that showcase your creativity and attention to detail.
This article was written by Stiven in combination with AI. The content described in this article is based on the author's personal opinions and data collection. If there are any errors or deficiencies, please correct me.

