Rainbow loom bracelets have exploded in popularity, and for good reason! These vibrant and customizable accessories are a fun way to express your style, and the best part? Learning how to make a rainbow loom bracelet is surprisingly easy. With a little practice, you'll be weaving colorful creations in no time!
Gathering Your Supplies
To embark on your rainbow loom adventure, you'll need a few key supplies:

Rainbow loom (the essential loom itself!)
Colorful rubber bands (the more colors, the more creative you can be!)
C-hook tool (your weaving companion)
S-hook tool (to secure your finished masterpiece)
Scissors (optional, for trimming stray rubber bands)
Getting Set Up: The Rainbow Loom
For beginners, the loom itself might seem a little intimidating. But fear not! Most rainbow looms are very straightforward to assemble. The loom will typically have a rectangular base with rows of hollow pegs. These pegs are where the magic happens – they'll hold your rubber bands as you weave your design.
Weaving the Basic Rainbow Bracelet
Now, let's get to the fun part – creating your first bracelet!
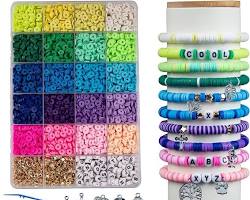
Choosing Your Colors: This is where you unleash your creativity! Rainbow loom bracelets come in endless color combinations. For beginners, we recommend starting with a single color or a simple two-color scheme. This allows you to focus on the weaving technique without getting overwhelmed by complex color patterns.
Adding the Rubber Bands: Here's where your loom pegs come into play. Following your chosen pattern (or simply your own design!), carefully stretch the rubber bands across the loom pegs. Pay attention to the direction you place the bands on the pegs – most patterns will specify this.
The Art of Weaving: This is where the C-hook tool becomes your partner in crime. The C-hook is used to grab and manipulate the rubber bands on the loom. The basic weaving technique involves using the C-hook to loop a band from the bottom row over the pegs and onto the top row. Repeat this process, following your pattern or design, until your bracelet reaches the desired length.
Finishing the Bracelet: Once your bracelet is woven, it's time to secure it. This is where the S-hook tool comes in. The S-hook helps attach the end of the bracelet to itself, creating a secure loop. Finally, remove the bracelet from the loom and gently trim any excess rubber band with scissors (if needed).
Beyond the Basics: Exploring Techniques and Designs (Optional)
As you gain confidence with the basic weaving technique, there's a whole world of possibilities to explore! Advanced weaving techniques like the cross weave or the fishtail braid can add interesting textures and patterns to your bracelets. Online resources offer a treasure trove of free bracelet design patterns, from classic single-color styles to vibrant stripes, ombre effects, and even character or logo designs.
Tips and Tricks for Success
Here are a few helpful hints to keep your loom bracelet making smooth and successful:
Maintain Even Tension: As you weave, try to keep the tension on the rubber bands consistent. This will help your bracelet look neat and polished.
Don't Overstretch: While you need some tension, avoid overstretching the rubber bands. This can cause them to snap or lose their elasticity.
Store it Safe: When you're not wearing your creation, store it in a sealed bag. This will protect your bracelet from dust and sunlight, keeping it looking its best.
Making your own rainbow loom bracelets is a rewarding and fun activity. It's a creative outlet that allows you to personalize your accessories and express your unique style. So, grab your loom, unleash your creativity, and get ready to weave a rainbow of colorful masterpieces!
This article was written by Stiven in combination with AI. The content described in this article is based on the author's personal opinions and data collection. If there are any errors or deficiencies, please correct me.


