waterfall bracelets have captured the hearts of crafters for their cascading design and surprising ease of creation. This guide will walk you through the process of making a waterfall bracelet on a loom, transforming a simple loom tool and colorful rubber bands into a beautiful piece of jewelry.
Materials and Tools: Gathering Your Supplies
To get started on your waterfall bracelet adventure, you'll need a few essentials:
Rainbow loom or loom tool:While a rainbow loom is a popular choice, other loom tools may work as well . Be sure to consult the instructions specific to your loom if it's not a rainbow loom.
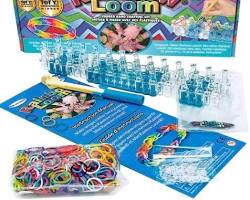
Loom bands: Here's where you can unleash your creativity! Choose a variety of colors for your design, with enough bands to create the base of the bracelet and multiple rows of the waterfall design.
Loom hook: This tool will be your trusty companion for grabbing, looping, and pulling the loom bands.
Clip (optional): A clip will provide a secure clasp for your bracelet if your loom doesn't have one built-in.
Sizing It Up: Finding the Perfect Fit
Before diving into the world of weaving, it's important to ensure your bracelet will be comfortable to wear. Grab a measuring tape and measure your wrist. A good rule of thumb, according to the Mayo Clinic, is to add an inch (2.54 cm) to your wrist measurement to account for a comfortable fit .

Setting Up Your Loom: Rainbow Ready
If you're using a rainbow loom, here's a quick guide to get it set up for your waterfall bracelet:
Separate the loom's frame from the base.
Find the pegs on the base – these are the little posts that will hold your loom bands.
Following the instructions specific to your rainbow loom model (diagrams or video tutorials can be helpful here), attach the loom frame to the base, ensuring the pegs are pointing upwards.
If you're using a different loom tool, consult the loom's instructions for set up. Most looms will follow similar principles.
Weaving the Waterfall: Row by Row
Now that your loom is ready, let's get to the fun part – creating the bracelet!
Crafting the Base: Place loom bands on the pegs according to your desired base color and pattern. You can use a single band for a thinner base or multiple bands for a thicker look.
Securing the Base: Using your loom hook, loop the bottom bands up and over the pegs to secure the base row of your bracelet.
We've now created the foundation for our waterfall design!
Choosing Your Waterfall Colors: Select two or three colors to create your cascading waterfall effect.
Starting the Waterfall: Using one of your chosen waterfall colors, place a single band on the center peg of the next row.
Looping for the Waterfall Design: Take another band of the same color and loop it around the bottom two pegs on either side of the center peg. Then, bring that same band up and over the center peg. This creates the first loop of your waterfall.
Adding More Layers (Optional): If you're using three waterfall colors, repeat step 3 with your other waterfall color(s), creating a double or triple loop over the center peg depending on your design.
Weaving Across the Row: Continue looping waterfall bands across the entire row, alternating colors as desired.
Securing the Waterfall Row: Use your trusty loom hook to loop the bottom bands of this row up and over the pegs, securing the waterfall loops you just created.
Repeating the Waterfall Magic: Repeat steps 1-6 to create additional waterfall rows until your bracelet reaches your desired length.
Finishing Touches: Securing and Customization
With your bracelet woven, it's time to take it off the loom. Follow the instructions specific to your loom for removal. Now you have two options for securing the bracelet:
Clip It On: Attach a clip to one end of the bracelet for a user-friendly clasp.
Tie It Up:For a more permanent closure, tie a secure knot using the end loops of the bracelet. You can find instructions for tying a square knot online if needed .
While rainbow looms are a popular way to create waterfall bracelets, there are alternative methods using different loom tools or even without a loom at all. We'll explore these techniques in future articles!

Stiven is an experienced bracelet making expert with over 10 years of making experience. They have a deep knowledge of a variety of materials and techniques to create a variety of exquisite bracelets, from simple beaded bracelets to complex multi-strand braided bracelets.
This article was written by Stiven in combination with AI. The content described in this article is based on the author's personal opinions and data collection. If there are any errors or deficiencies, please correct me.


