string bracelets are a delightful craft project, perfect for unleashing your creativity and ending up with a personalized accessory. The beauty of these bracelets lies in their simplicity – they require minimal materials and offer endless customization options. So, whether you're a complete beginner or looking for a fun weekend activity, this guide will show you how to make a string bracelet in no time!
Materials Needed:
Gather these few essentials to embark on your string bracelet adventure:

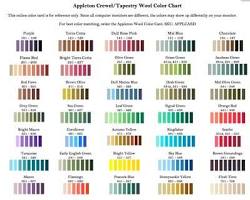
Embroidery floss (embark on a color adventure! Choose a single color for a classic look, or select multiple colors to create stripes or even patterns.)
Scissors (to snip your floss to size)
Masking tape (optional, to secure the floss ends while braiding)
Clip or safety pin (optional, to hold the floss taut while braiding)
Choosing Your Design (Optional):
String bracelets come in a variety of designs, from simple single-color styles to eye-catching stripes and even intricate patterns. For beginners, a single-color bracelet is a great way to get comfortable with the braiding technique. Once you've mastered the basics, you can experiment with more complex designs later!
Getting Started: Prepping Your Floss
Now that you have your supplies ready, let's prepare the floss for braiding!
Choosing Colors: As mentioned earlier, this is your chance to get creative! Pick a single color you love, or select a combination that reflects your style.
Cutting the Floss: To determine the ideal floss length, measure your wrist and add a few extra inches for tying knots at the end. A good rule of thumb is to triple your desired finished bracelet length. Once you have your measurements, snip the floss strands accordingly.
Securing the Floss (Optional): While braiding, you might find it helpful to secure the ends of your floss strands. A handy way to do this is by using a small piece of masking tape. Simply wrap the tape around the grouped floss ends, creating a sturdy base for braiding.
The Essential Knot: The Forward Knot
The foundation of your string bracelet is the forward knot, a technique commonly used in friendship bracelets. Here's how to create a forward knot:
Hold two floss strands together, one in each hand.
Make a "four" shape with the color in your right hand, reaching it under and around the other floss strand.
Then, bring the end of the right floss strand up through the loop you just created, and pull both strands gently to tighten the knot.
Braiding the Bracelet
With your forward knot mastered, it's time to bring your bracelet to life!
Starting the Braid: Begin by holding all your floss strands together (if using multiple colors). Using the forward knot technique, start braiding! Make sure to alternate which strand goes over the other with each knot to create a secure braid.
Maintaining Consistent Braiding: The key to a neat and even bracelet is maintaining consistent tension on the floss strands as you braid. Don't be afraid to gently adjust the tension throughout the process.
Finishing Touches
Once your bracelet reaches your desired length, it's time to secure the ends. Tie a secure knot at the end of the woven braid using the remaining floss. To create a loop closure, braid a short section with the remaining floss and then tie another knot to secure it.
Tips and Troubleshooting
Here are some helpful tips for a smooth braiding experience:
Good Lighting is Key: Having good lighting can help you see the different floss colors clearly, especially if you decide to tackle a more intricate design later.
Take Breaks: Braiding for extended periods can cause hand strain. Take breaks to stretch your fingers and avoid discomfort.
Fixing Mistakes: Don't worry if you make a mistake! Carefully undo the last few knots and re-braid the section.
Creating a string bracelet is a rewarding and fun way to express yourself through a personalized accessory. And the best part? This is just the beginning! As you gain confidence with your braiding skills, you can experiment with different colors, and designs, and even incorporate beads for added flair. So grab your floss, unleash your creativity, and get ready to braid your way to a string bracelet masterpiece!
Bonus Tip:
For those who prefer a bit more structure while braiding, you can use a clipboard or a dedicated friendship bracelet loom. These tools can help keep your floss strands organized and taut while you create your braid.
This article was written by Stiven in combination with AI. The content described in this article is based on the author's personal opinions and data collection. If there are any errors or deficiencies, please correct me.

