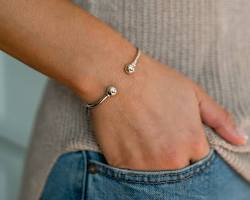
sliding knot bracelets offer a perfect blend of style and practicality. With their unique adjustable knot, these bracelets fit any wrist size, making them a versatile and thoughtful handmade gift. Plus, they require minimal materials and can be customized to suit any taste. Let's dive into the simple process of creating your own sliding knot bracelet!
Gathering Your Supplies:
Creating a sliding knot bracelet requires just a few things:

Cord or String: This is the foundation of your bracelet. Choose a material that complements the intended style. Cotton cord offers a natural, earthy feel, while hemp twine adds a touch of rustic charm. For a more elegant look, consider silk thread.
Scissors: To snip your cord or string to the desired length.
Beads (Optional): Incorporate beads for visual appeal or to add symbolic meaning. Round gemstones like amethyst (peace) or rose quartz (love) can hold special significance. Wooden beads can represent grounding and strength, while colorful glass beads can simply add a touch of cheer.
Understanding the Magic of the Sliding Knot:
The beauty of a sliding knot bracelet lies in its functionality. Unlike traditional bracelets with clasps, this design features a single adjustable knot that allows the bracelet to be tightened or loosened for a perfect fit. This makes it a great option for gifting or creating bracelets for people of all ages.
Creating Your Bracelet: Step-by-Step
Now, let's get crafting! Here's a breakdown of the process:
Cutting the Cord or String: Measure your desired bracelet length, adding a few extra inches to account for knotting. Remember, the bracelet will be adjustable, so don't worry about making it too precise.
Tying the Initial Knot: Secure one end of the cord or string with a strong knot. There are many options here, a square knot or a surgeon's knot would both work well.
Adding Beads (Optional): If you're using beads, thread them onto the cord, spacing them out evenly or creating a specific pattern if desired. Consider the size and color of the beads in relation to your chosen cord material for a cohesive look.
Creating the Sliding Knot: Here's the key step! Hold the cord about six inches from the secured end, creating a loop. Now, take the tail end of the cord (the shorter piece) and wrap it underneath the loop, then bring it back up through the center of the loop. Grab the tail end again and pull it gently to tighten the knot. You should now have a loop at one end and the two main strands of cord on the other side of the knot. This is the sliding mechanism!
Finishing Touches:
Securing the Other End: Tie a secure knot at the other end of the cord, leaving a small loop for sliding the bracelet on and off.
Trimming the Excess Cord: Use scissors to trim any excess cord after knotting.
Adding Your Personal Touch:
The beauty of sliding knot bracelets lies in their customization. Here are some ways to make them your own:
Using Different Cords or Strings: Experiment with different materials like leather cord or braided thread for a unique look and feel.
Experimenting with Beads: Don't be afraid to mix and match bead sizes, shapes, and colors to create a personalized design. You can even incorporate letter beads to spell out a name or a word with special meaning.
Adding Charms or Pendants (Optional): For an extra touch of personalization, consider incorporating small charms or pendants that represent a special occasion, hobby, or interest.
A Bracelet for Every Wrist:
With their adjustable nature and endless customization possibilities, sliding knot bracelets are a fantastic way to express your creativity and create unique handmade gifts. So grab your materials, unleash your imagination, and get ready to craft some stylish and versatile bracelets for yourself and your loved ones!
This article was written by Stiven in combination with AI. The content described in this article is based on the author's personal opinions and data collection. If there are any errors or deficiencies, please correct me.


