How to make a rubber band bracelet with fingers? Rubber band bracelets are a fun and trendy accessory, but the looms used to create them can add to the cost. The good news? You can create these colorful bracelets with just your fingers and a pack of rubber bands! This guide will walk you through the steps of making a classic fishtail braid bracelet, transforming simple rubber bands into a piece of personalized wrist candy.
Materials and Tools: All You Need is in Your Hands
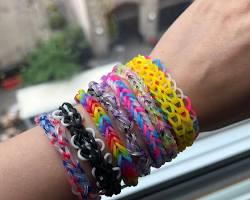
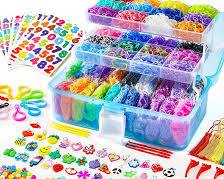
The beauty of finger bracelets lies in their simplicity. All you need to get started is a pack of rubber bands in a variety of colors to suit your design preferences. Consider using brighter colors for a bold look, or softer pastels for a more subtle touch .

Choosing Your Design: Simple or Spectacular?
The world of rubber band bracelets offers a variety of design options, from simple to complex. For beginners, we'll focus on two easy-to-master designs:
Classic Chic: Use a single color of rubber band for a timeless and elegant look.
Striped Sensation: Alternate between two colors of rubber bands to create a striped pattern. This design adds a pop of color and is perfect for showcasing your favorite color combinations.
More intricate designs are achievable with practice, and we'll explore those techniques in a future article. For now, let's get started on creating a fabulous fishtail braid bracelet!
Finger Fun: The Basic Fishtail Braid
The fishtail braid is a popular choice for finger bracelets, and with good reason. It's relatively simple to learn and creates a visually interesting design. While understanding a basic braid can be helpful, it's not essential for mastering the fishtail. If you're unfamiliar with a basic braid, here's a quick refresher :

Hold three rubber bands together, one on each finger and one in the middle.
Take the rightmost band and loop it over the middle band, placing it next to the leftmost band.
Repeat steps 1 and 2, always moving the outer band to the center.
Continue braiding until the desired length is reached.
Mastering the Fishtail: Step-by-Step Guide
Now that you've grasped the concept of braiding, let's get to the fun part – creating a fishtail braid bracelet with your fingers!
Start with four rubber bands in your chosen colors.
Hold three bands in your hand like you would for a basic braid. Place the fourth band between your thumb and index finger of your other hand.
Take the bottom band from the group of three in your hand and loop it over the other two bands, placing it on the fourth band held between your thumb and index finger. This band (originally from the group of three) now becomes part of the group of three in your hand.
Take the band that was originally between your thumb and index finger (now the outermost band) and loop it over the remaining two bands in your hand, placing it with the other two. This band becomes part of the group held between your thumb and index finger.
Repeat steps 3 and 4, consistently moving the outermost band from each side to the opposite side. This creates the distinctive weaving pattern of a fishtail braid.
Continue braiding until your bracelet reaches your desired length.
Finishing Touches: Securing and Customization
With your braid complete, it's time to secure the end. Simply loop the last three rubber bands together to create a knot. This will hold your bracelet securely on your wrist.
Feeling creative? Here are some ways to customize your finger bracelet:
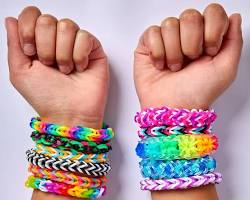
Color Chaos: Experiment with different color combinations to create unique patterns. Rainbow stripes, geometric designs, or even a two-toned twist are all possibilities.
Bracelet Bonanza: For a thicker bracelet, use more rubber bands when braiding. Just remember to adjust the number of bands based on the desired thickness and your braiding comfort.
Braiding Beyond the Basics: While we focused on the fishtail braid in this article, there are other braiding techniques you can explore to create more intricate designs. Stay tuned for future articles where we'll delve into these exciting possibilities!
With a little practice and this guide at your fingertips, you'll be a finger bracelet pro in no time! So grab your rubber bands, unleash your creativity, and get ready to craft stylish and personalized bracelets. The possibilities are endless!

Stiven is an experienced bracelet making expert with over 10 years of making experience. They have a deep knowledge of a variety of materials and techniques to create a variety of exquisite bracelets, from simple beaded bracelets to complex multi-strand braided bracelets.
This article was written by Stiven in combination with AI. The content described in this article is based on the author's personal opinions and data collection. If there are any errors or deficiencies, please correct me.