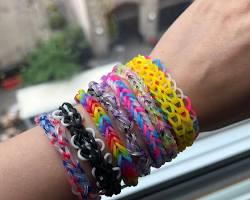
rubber band bracelets have taken the world by storm, offering a fun and trendy way to accessorize. But did you know you can create these colorful bands yourself with the help of a loom? Making rubber band bracelets with a loom is surprisingly easy and affordable, allowing you to unleash your inner designer and craft unique pieces that reflect your style. This guide will walk you through the essentials, from gathering supplies to creating your first bracelet!
Essential Supplies
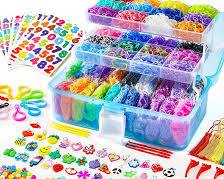
To embark on your rubber band bracelet-making adventure, you'll need a few key items:
Rainbow Loom or similar loom tool (different sizes are available)
Rubber bands in various colors (standard size is recommended for beginners)
Loom hook (usually included in most loom kits)
Clip (optional, for attaching charms)
Scissors (optional, for cutting excess rubber bands)
Choosing the Right Loom (Optional)
Looms come in various sizes, with some better suited for beginners. A smaller loom with fewer pegs is easier to manage for first-time bracelet makers. Some looms even offer additional features like interchangeable pegs, allowing you to create bracelets in different shapes as you gain experience.
Getting Started with Your Loom
Now that you have your supplies, let's get your loom ready for action!
Setting Up the Loom: Most looms are pre-assembled, but if yours requires setup, follow the included instructions. Position the pegs on the loom according to your desired bracelet design. Many loom designs have online tutorials to guide you through specific peg placement.
The Magic of the Loom Hook: This handy tool is your partner in creating the bracelet. The hook allows you to easily place and manipulate rubber bands on the loom pegs.
Creating Your First Bracelet (Step-by-Step Guide)
It's time to bring your creativity to life! Here's a breakdown of creating your first bracelet:
The Foundation Row: The first step is creating the base of your bracelet. Following your chosen pattern, learn how to place the initial rubber bands on the loom pegs to form the foundation row.
Building Up Your Design: Now comes the fun part! Using the loom hook, you'll add rows of rubber bands according to your design. The hook helps you loop and secure the bands onto the pegs, gradually building your bracelet one colorful row at a time.
Removing the Bracelet and Finishing Touches: Once your masterpiece reaches its desired length, it's time to take it off the loom. Learn how to safely remove the finished bracelet, making sure the bands stay secure. You can use a clip or another method to fasten the ends of the bracelet for a polished look.
Finding Inspiration and Exploring Techniques
The world of loom bracelet creation is vast and exciting!
The Power of Online Resources: The internet is a treasure trove of inspiration and instruction. Search for online tutorials and free bracelet design patterns to find endless ideas and techniques for creating unique bracelets.
Beyond the Basics: As you gain confidence, explore advanced techniques like single band bracelets, which use only one band per peg, or double band bracelets for a thicker and more intricate design. You can even create adorable charms for your bracelets using special loom charm techniques.
Embrace the Fun!
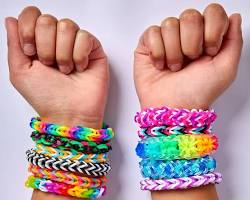
Making rubber band bracelets with a loom is a rewarding and enjoyable activity that allows you to express your creativity and personalize your style. So, grab your loom, your rubber bands, and get ready to weave your way to some colorful fun!

Stiven is an experienced bracelet making expert with over 10 years of making experience. They have a deep knowledge of a variety of materials and techniques to create a variety of exquisite bracelets, from simple beaded bracelets to complex multi-strand braided bracelets.
This article was written by Stiven in combination with AI. The content described in this article is based on the author's personal opinions and data collection. If there are any errors or deficiencies, please correct me.