elastic bracelets are a fun and customizable jewelry option, allowing you to express your style with a variety of beads and colors. But the key to a well-made elastic bracelet lies in using the right knot to secure it. Fear not, knotting an elastic bracelet is a breeze! This beginner's guide will walk you through the two most popular knots, ensuring your creations stay put for years to come.
Materials You'll Need:
Elastic Cord: Look for a stretchy and strong elastic cord specifically designed for jewelry making. The thickness you choose will depend on the size of your beads. Larger beads work best with a thicker cord for better support.

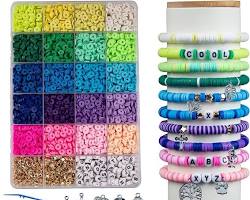
Beads: The beauty of elastic bracelets is their versatility! Glass, plastic, wood – the choice of bead materials is vast. Select beads that complement each other and fit comfortably through your chosen elastic cord.
**Scissors: **To snip the elastic cord after knotting.
Choosing Your Knot: Square Knot vs. Surgeon's Knot (Optional)
There are two main knots used for elastic bracelets: the square knot and the surgeon's knot. Both are secure options, and the choice often comes down to personal preference or the desired knot complexity. The square knot is a basic knot you might already be familiar with, while the surgeon's knot offers an extra layer of security with its double loop.
Tying the Square Knot:
Stringing the Beads: Begin by threading your beads onto the elastic cord. You can create a simple pattern or alternate colors for a more playful look.
Forming the First Loop: Once you've strung your desired number of beads, fold the elastic cord back onto itself to create a loop near the end of the beads.
Completing the Square Knot: Hold the loop in place with your fingers. Take the right-hand end of the cord and bring it underneath the left cord. Then, lift the right cord end up and through the loop you just created. Now, guide the right cord end down through the larger loop closest to the beads. You've essentially made a square shape with the cord.
Tightening the Knot: Gently pull on both the right and left cord ends to tighten the knot securely. Make sure the loop around the beads sits snugly without any gaps.
Tying the Surgeon's Knot (Optional):
If you prefer a knot with an extra layer of security, the surgeon's knot is a great option.
Stringing the Beads: Similar to the square knot, start by threading your beads onto the elastic cord.
Creating the Double Loop: Instead of a single loop, fold the elastic cord back onto itself twice, forming a double loop near the end of the beads.
Completing the Surgeon's Knot: Hold the double loop in place with your fingers. Take the right-hand cord end and thread it under the center strand, between the two loops you just created. Now, bring the right cord end up and thread it through the first loop closest to the beads. Finally, pull the right cord end down through the larger loop closest to the other end of the cord.
Tightening the Knot: Gently pull on both the right and left cord ends to tighten the knot securely.
Finishing Touches and Beyond!
Once you've secured your knot with your chosen method, use scissors to trim any excess elastic cord close to the knot. Give the bracelet a gentle tug to ensure the knot is secure and the beads sit comfortably.
Experimenting with Techniques:
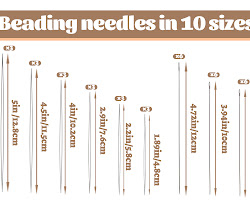
For threading very small beads, a beading needle can be helpful, but it's not essential. If you'd like your bracelet to have a clasp for easier wearability, there are separate tutorials available online that can guide you through that process.
With a little practice, you'll be knotting elastic bracelets like a pro! Remember, the beauty of these creations lies in their customizability. So unleash your creativity, explore different bead combinations and designs, and start crafting beautiful and unique elastic bracelets to express your style!
This article was written by Stiven in combination with AI. The content described in this article is based on the author's personal opinions and data collection. If there are any errors or deficiencies, please correct me.

